
- 프런트엔드
- Intellij
- postman session
- postman pre-request
- 다빈치 리졸브
- postman collection variables
- LSL_Script
- Android/iOS Developer
- postman html parse
- emplace_back
- 좋은 개발자
- c#
- postman collection
- web developer
- Android
- postman excel
- Front-end developer
- C++
- Unity
- solidity
- postman automations
- postman csv
- MFC
- Java
- Interaction developer
- postman tests
- 우수한 프런트 개발자
- postman
- UI/UX Engineer
- oracle
| 일 | 월 | 화 | 수 | 목 | 금 | 토 |
|---|---|---|---|---|---|---|
| 1 | ||||||
| 2 | 3 | 4 | 5 | 6 | 7 | 8 |
| 9 | 10 | 11 | 12 | 13 | 14 | 15 |
| 16 | 17 | 18 | 19 | 20 | 21 | 22 |
| 23 | 24 | 25 | 26 | 27 | 28 | 29 |
| 30 |
- Today
- Total
david's daily developer note
[BE] Slack API - Log notice 본문
현재 스프링부트로 개발하고 있는 서버의 로그를 Slack API를 사용하여 출력해보자.
1. 워크스페이스 생성하기
Slack
nav.top { position: relative; } #page_contents > h1 { width: 920px; margin-right: auto; margin-left: auto; } h2, .align_margin { padding-left: 50px; } .card { width: 920px; margin: 0 auto; .card { width: 880px; } } .linux_col { display: none; } .platform_i
slack.com
2. 슬랙 앱 생성하기
https://api.slack.com/apps/new
Slack API: Applications | Slack
Your Apps Don't see an app you're looking for? Sign in to another workspace.
api.slack.com
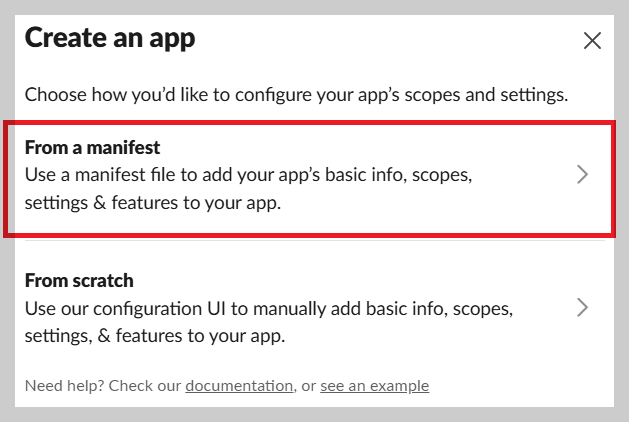
상기 링크에서 Create an App 버튼 클릭하고 팝업에서 "From a manifest" 선택
1단계에서 생성한 워크스페이스 선택

매니페스트 파일 생성

구성 정보를 확인하고 생성 버튼 클릭

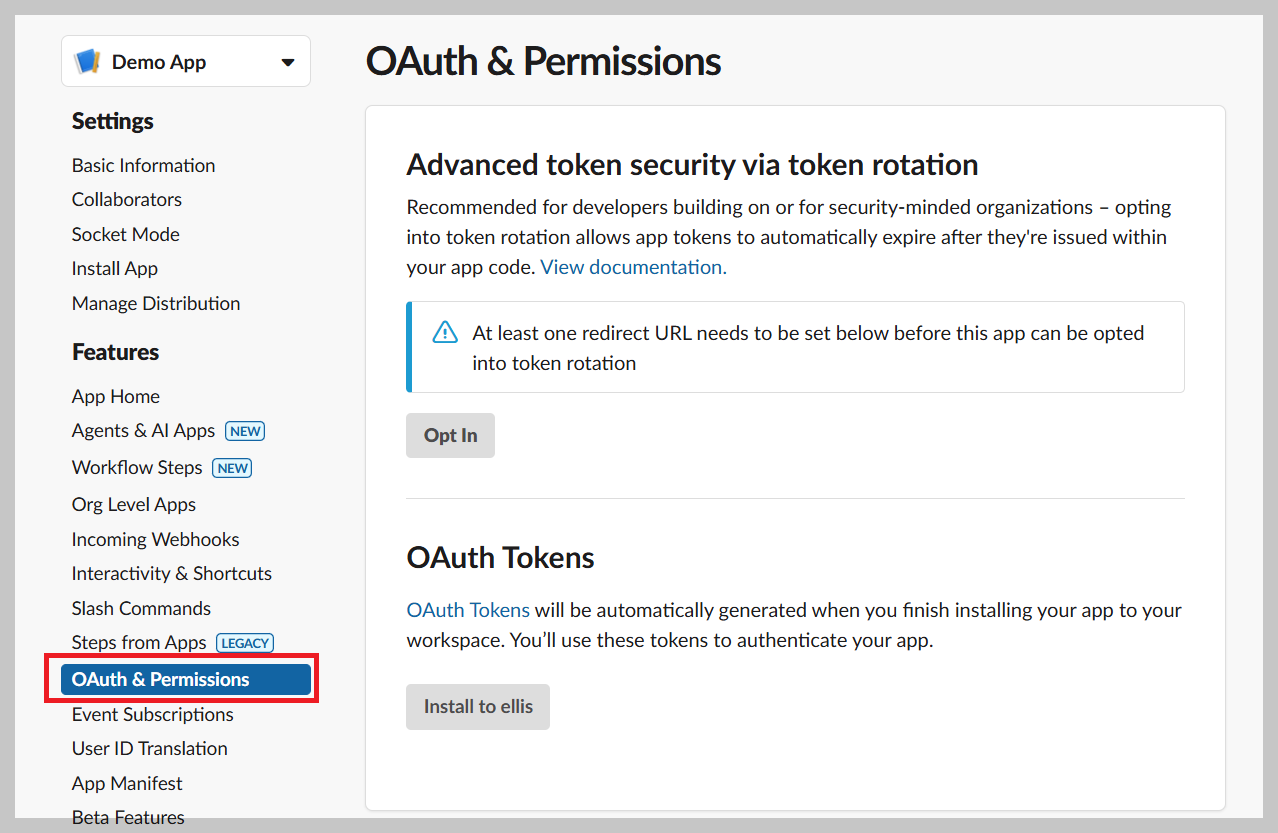
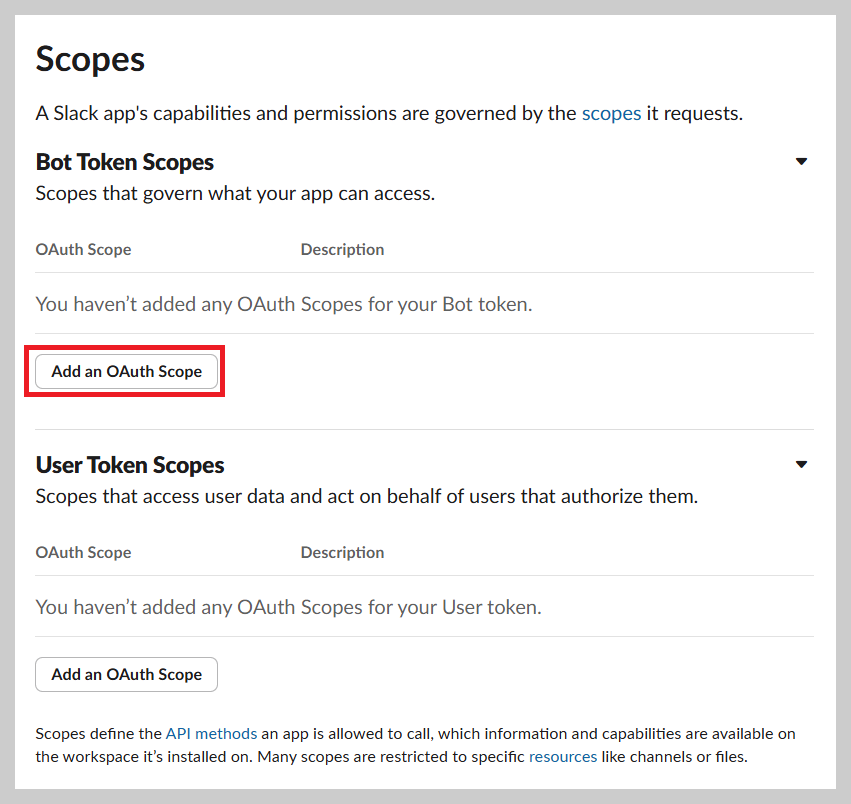
3. 권한 설정

Web API methods | Slack
api.slack.com
4. 게시 채널 (채팅방) 만들기


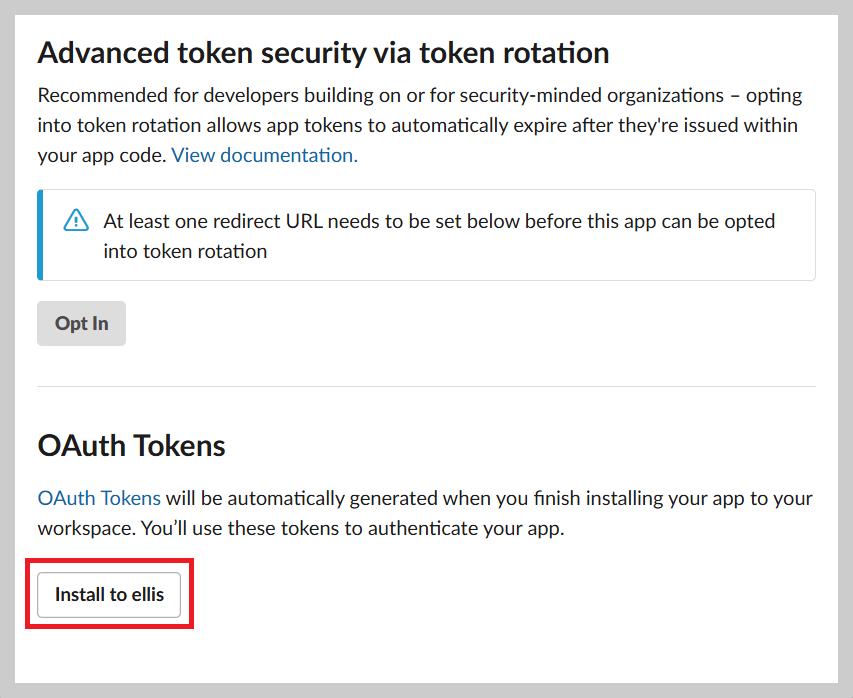
5. 앱 인스톨하기 (채널에 앱 추가)
Features ▶ OAuth & Permissions ▶ OAuth Tokens ▶Install to {work space name}


6. 메시지 코드 수행
final String token = "Bot User OAuth Token";
final String channel = "Channal id";

try {
    LinkedHashMap<String, Object> slackMsgParam = new LinkedHashMap<>();
    slackMsgParam.put("channel", channel);
    slackMsgParam.put("text", message);

    HttpClient client = HttpClientBuilder.create().build();
    HttpPost request = new HttpPost("Webhook URLs for Your Workspace");
    request.setHeader("Content-Type", "application/json");
    request.addHeader("Authorization",  "Bearer "+ token);
    request.setEntity(new StringEntity(new Gson().toJson(slackMsgParam)));

    HttpResponse response = client.execute(request);

} catch (IOException e) {
    logger.error("slack message is failed : {}", e.getMessage());
}
1번줄의 token값은 상단 그림의 토큰 값
2번줄의 채널ID값은 아래 경로로 확인 가능


요청 URL은 다음에서 확인

끝
'[Develop] Web > Back-end' 카테고리의 다른 글
| [BE] 일정 시간 후에 수행하는 조각 코드 java (0) | 2025.03.04 |
|---|---|
| [BE] CRC Error Resolved in IntelliJ Gradle Project (0) | 2025.02.11 |
| [BE] SpringBoot 3.2.3 developer tools simple note (0) | 2024.03.19 |
| [BE] Spring security AuthenticationSuccessEvent & SessionDestroyedEvent (0) | 2023.10.30 |
| [BE] IntelliJ + MariaDB Local Setting (1) | 2023.10.24 |